An Easy Bottle Cap Hack to Thread a Needle Effortlessly
Threading a needle can feel surprisingly tricky—especially if your eyesight isn’t perfect or the needle’s eye is very small. Many of us have squinted, struggled, and gotten frustrated trying to push the thread through that tiny opening.
There is, however, a simple DIY solution that makes the process much easier. With just a plastic bottle cap and a piece of thin wire, you can create a homemade needle threader that works surprisingly well.
Below you’ll learn exactly how to do it, step by step.
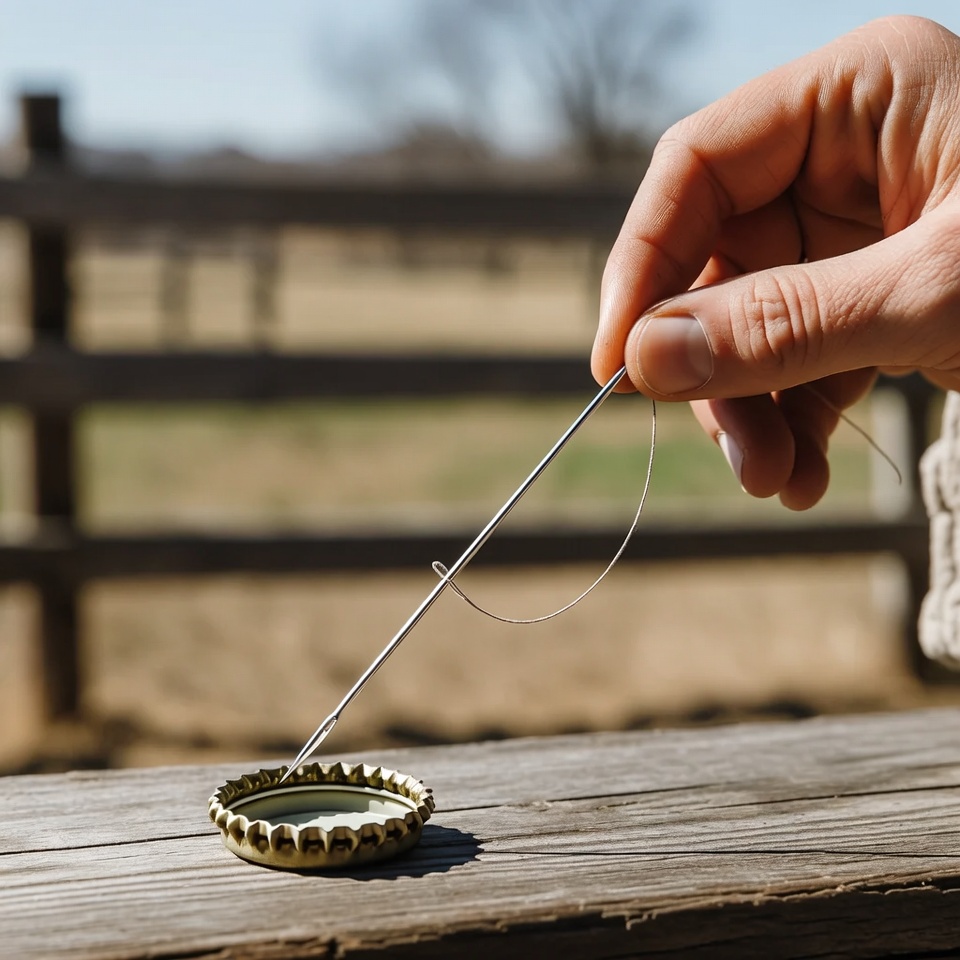
Table of Contents
- Materials You’ll Need
- Step-by-Step Instructions
- Step 1: Prepare the Bottle Cap
- Step 2: Shape the Wire
- Step 3: Attach the Wire to the Cap
- Step 4: Use Your DIY Needle Threader
- Enjoy Easier Needle Threading
1. Materials You’ll Need
To make this simple needle-threading tool, gather:
-
Bottle cap
Choose a cap large enough to comfortably hold the thread you use most often. -
Thin wire
Use a wire that is fine but sturdy, flexible enough to shape, yet strong enough not to break easily.
2. Step-by-Step Instructions
Step 1: Prepare the Bottle Cap
Carefully cut along the top edge of the bottle cap to open a small slot or hole.
This opening is where the wire will pass through and where the thread will later be pulled.
Be cautious while cutting to avoid slipping or injuring yourself.
Step 2: Shape the Wire
Take your piece of thin wire and bend one end into a small hook.
This hook will act like the loop on a traditional needle threader. It will:
- Catch the thread
- Help guide it smoothly through the needle’s eye
Step 3: Attach the Wire to the Cap
Insert the hooked end of the wire through the hole you made in the bottle cap.
- Feed the hook from the outside to the inside so the hook ends up inside the cap.
- The straight part of the wire should extend outside the cap so you can pull it easily.
Ensure the wire is secure and doesn’t slip out when you pull it.
Step 4: Use Your DIY Needle Threader
Now your makeshift threader is ready to use:
- Place the needle inside the bottle cap, positioning the eye of the needle close to the wire hook.
- Insert the end of your thread into the hook of the wire.
- Gently pull the wire outward from the cap.
As you pull, the wire hook will guide the thread through the needle’s eye and out the other side. You’ll notice how much easier and faster this is than trying to do it by hand.
3. Enjoy Easier Needle Threading
With just a bottle cap and a piece of thin wire, you’ve created your own simple needle threader. This quick DIY tool makes threading needles far less frustrating and much more accessible.
Use this trick whenever you sew, and enjoy a smoother, more enjoyable threading experience—no straining, no guessing, just an easy, reliable way to get your needle ready to stitch.